

Is Quilting an Expensive Hobby?
Ultimately the answer is…it Depends!
As with many creative pursuits, the answer is nuanced, shaped by various factors. My own quilting journey started out of necessity when my spouse and I were facing economic hardship. Other quilters I know started when they were gifted a machine and had access to generational quilting knowledge from someone in their family.
Some quilters really like to spend money or all the latest designer fabrics, gadgets and gizmos. Truely, one of my best quilty friends had 16 sewing machines – only three of which she regularly uses – and regularly drops hundreds of dollars at the local quilt shops. Me, I have 2 machines and most of my fabric has been thrifted from family, friends, and Goodwill.
The point is, just like any hobby really -> it can be as expensive or as cheap as you make it.
In this article, we'll delve into the costs associated with quilting, from the initial investment in beginner supplies to the philosophies that underpin the quilt-making journey. At the end of this post, I hope you feel you have enough information to give quilting a try.
The Initial Investment - Beginner Quilting Supplies
As with any hobby, the initial investment in equipment and supplies can be daunting. However, when you are just starting something, you really don’t have to spend a ton of money on the newest and best equipment – especially with quilting.
Essential Supplies and Costs:
Sewing Machine ($160-$300):
For beginners, a basic model that includes quilting capabilities from reliable brands (Brother, Singer, etc.) is recommended.
Consider exploring the secondhand market (Facebook Marketplace, eBay, Craigslist, etc.) for high-end vintage or barely used/like-new machines.
Today, most modern quilters rely on their sewing machine which can cost anywhere between a few hundred to thousands of dollars. But don’t let that scare you. If you are just starting on your quilting journey, there are many affordable sewing machines available on the market for beginners. My first sewing machine was a Brother CS 6000i (discontinued) I bought off Amazon back in the early 2000’s for $150. The Brother CS 7000x is the latest model (~$200) and you can find it here.
The key to finding a beginner sewing machine that can also handle quilting is to look for a machine that can drop it’s feed dogs, as this is how you quilt the stiches that give quilts their name. Most beginner machines that have this feature will use terminology such as “quilting machine”, “sewing and quilting”, “fully featured”, or “3 in 1”, etc.
If you can’t find a new machine in your price range, check out Facebook Marketplace, Ebay, or Craigslist. People are always selling used sewing machines at an even lower cost, as you can see here from Facebook marketplace and eBay:


At its heart, quilting is about embracing frugality. If you can’t afford a sewing machine look into hand quilting. For the longest time, quilts were hand-sewn. Although much rarer to see these days, hand sewn quilts are still considered timeless and are a great way to dip your toes into quilting without much upfront costs. And, while more labor intensive and time-consuming, hand sewing can also be very therapeutic and relaxing.
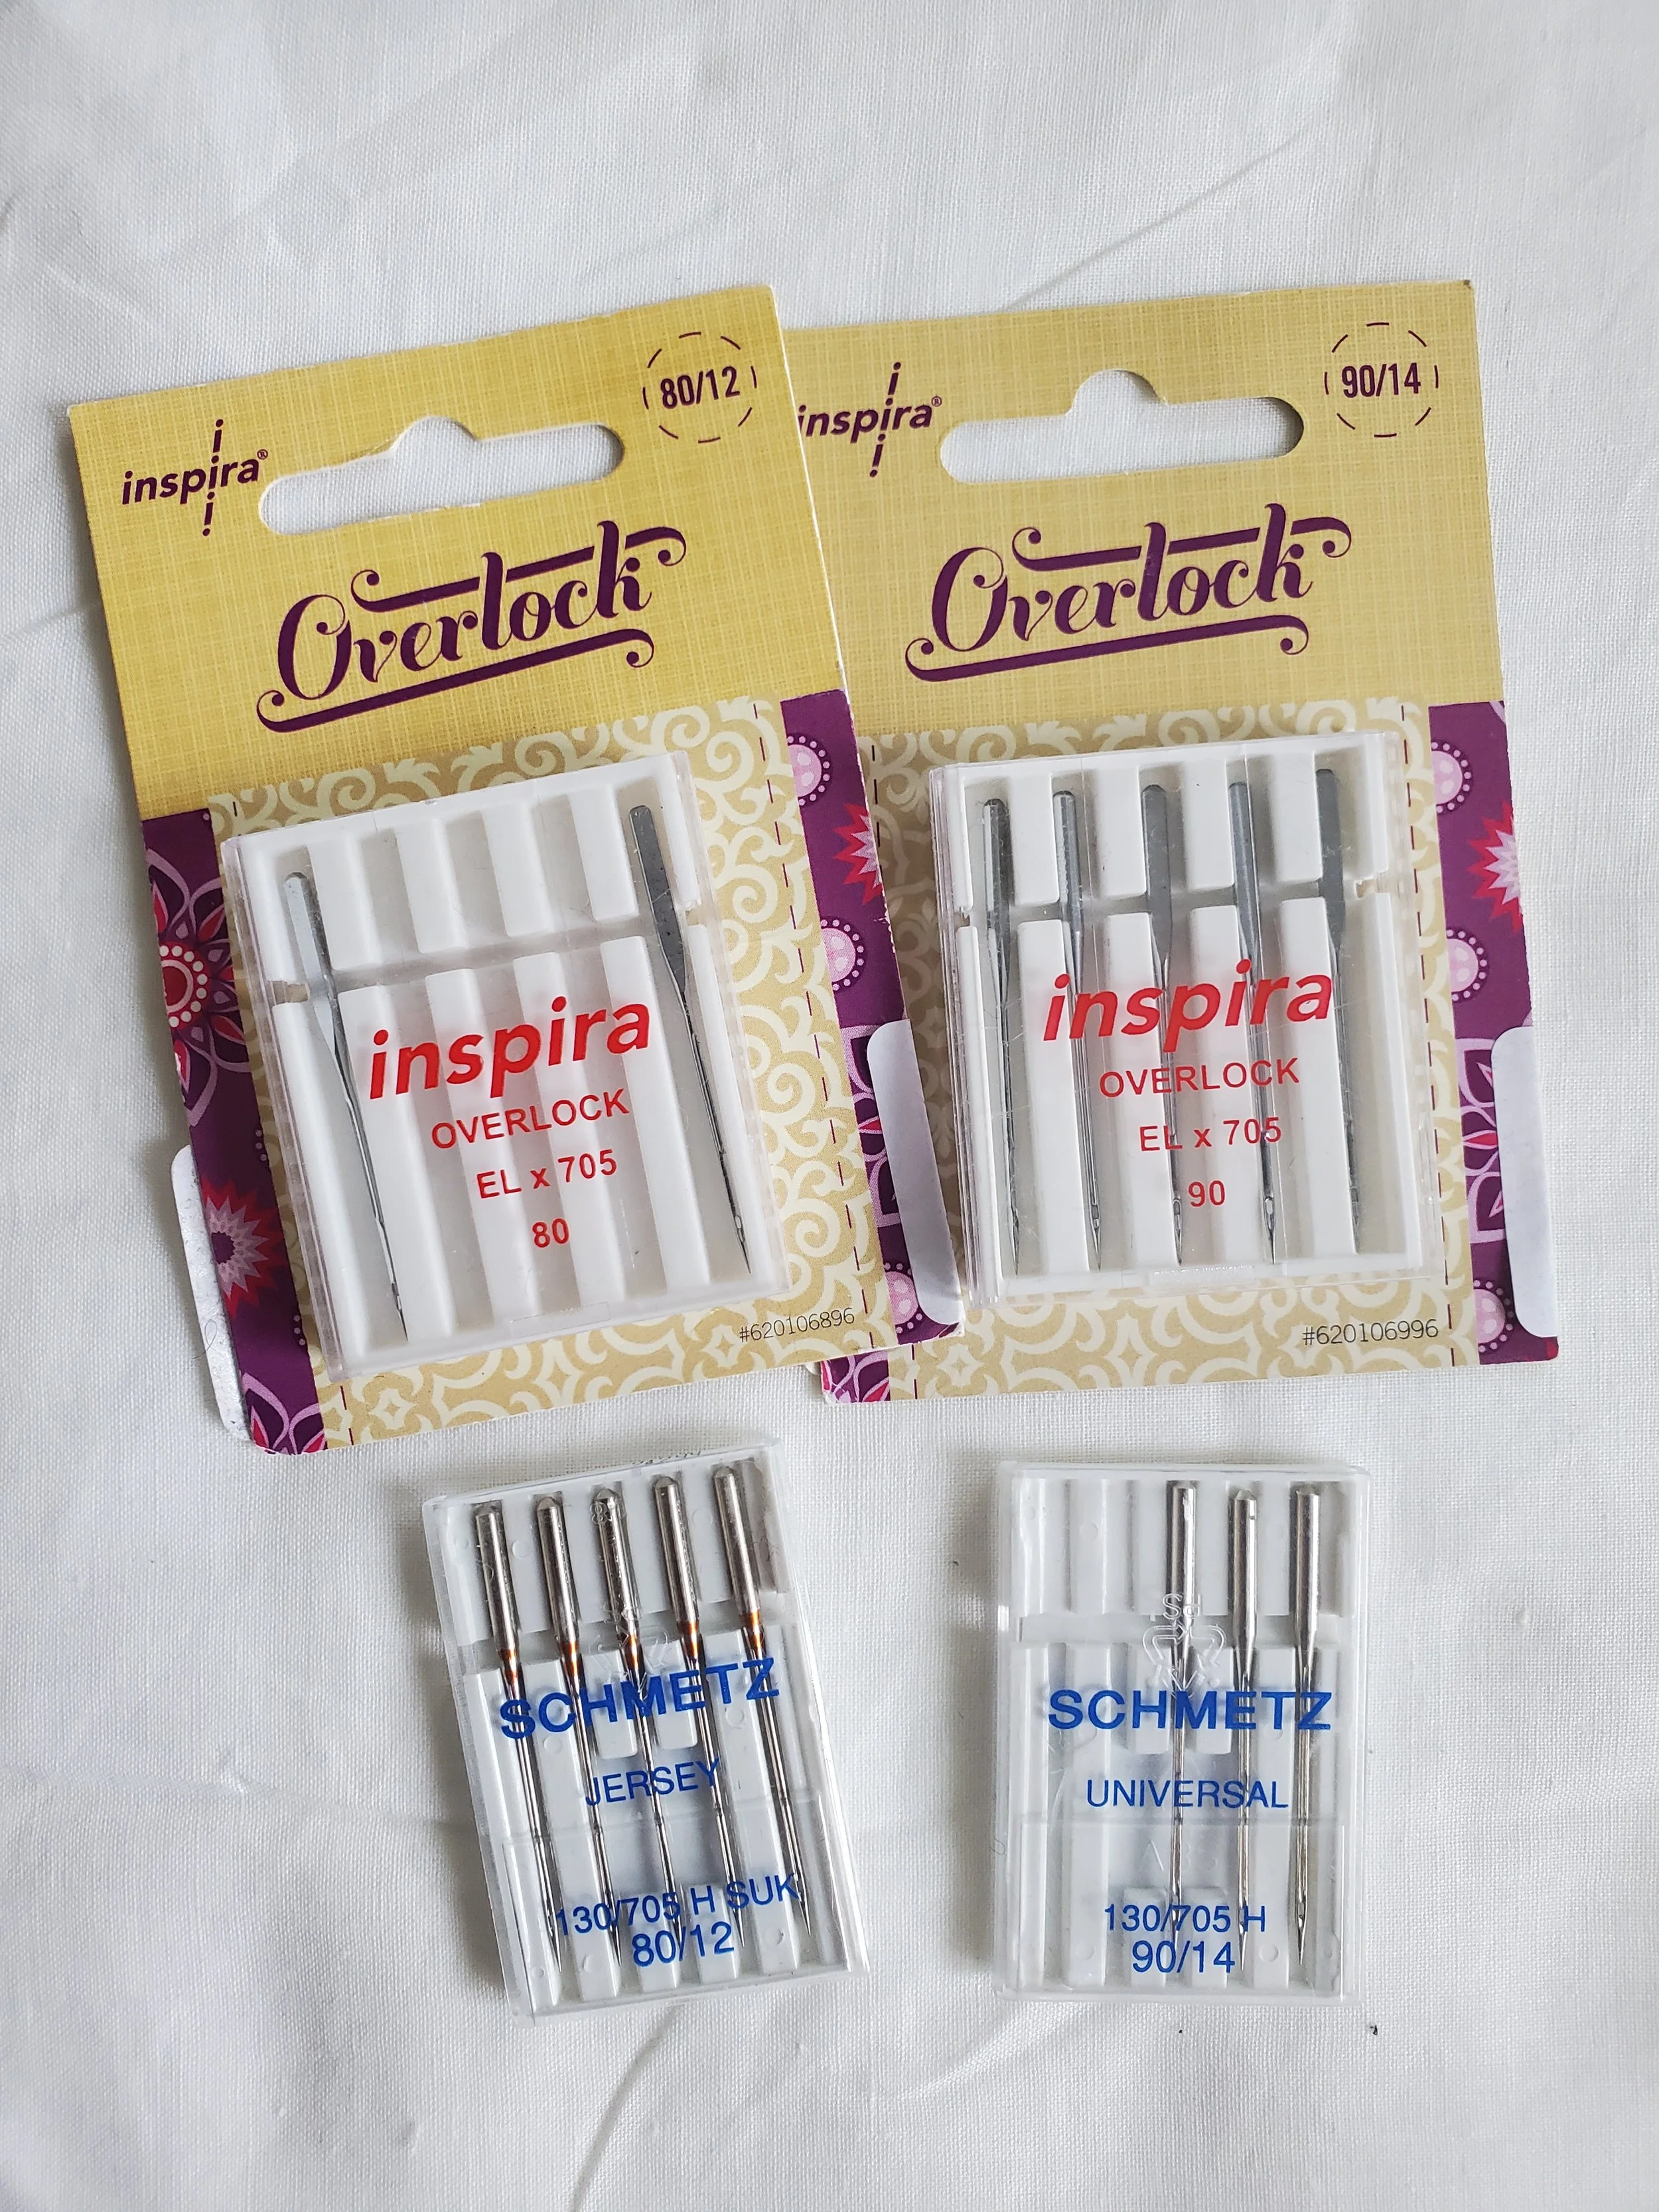
Sewing Machine Needles ($6-$15):
UNIVERSAL 80/12 sewing machine needles work well with cotton fabric.
Alternative UNIVERSAL needles to look for – 70/10, 90/14, or 100/16.
A pack of needles (usually 3-10 needles per pack) costs between $6-$15.
Regardless of whether you decide to machine- or hand-quilt (or both), the next cost you’ll need to consider is sewing needles.
If you are diving into machine quilting, you can expect your sewing machine to come with a universal 80/12 needle, which can handle most machine sewing at different stages of quilt making. However, you may still want to consider picking up a few other types of needles (or extras of your 80/12’s). 70/10 machine sewing needles are another good option to have for piecing as well as 90/14 or 100/16 (these are usually recommended for the actual quilting itself).
There are two key things to remember for sewing machine needles:
Change them frequently - usually before you start your next project – so it’s best practice to keep plenty of extras on hand.
When you look to buy new sewing machine needles, look for the term “UNIVERSAL”. These have the most versatile tip and can be used with a range of fabrics. If you want to learn more about different types and styles of sewing machine needles, Schmetz has a fantastic reference guide you can check out here.

Rotary Cutter ($25-$30):
Invest in a name-brand model like Olfa or Fiskars for efficient fabric cutting.
Average price: $25-$30.
Rotary cutters are actually a fairly new invention in the quilting world.
Basically, a rotary cutter is glorified pizza cutter with a crazy sharp blade that you ONLY use for fabric (not pizza). This style of cutter emerged in 1979 and was originally introduced for garment-making but was quickly adopted by quilters as the rotary cutter was found to be much easier and faster than using scissors for cutting fabric – especially for strip piecing. You can read more on this history here.
Rotary cutters come in various sizes – most commonly 18mm, 28mm, 45mm and 60mm. The larger the blade, the more layers or thicker fabrics you can cut. Additionally, because the blades are so sharp, rotary cutters also have a protective mechanism to prevent the blade from being exposed unintentionally (unlike the pizza cutter you have in your kitchen). There are a lot of different styles of handles, so don’t be afraid to try different styles until you find one you like. (Personally, I like the Fiskars Loop Handle Style)
It is one of the most important tools, other than the sewing machine, that makes it possible for so many quilters today to accomplish what they want to make in the time they have available. This is one tool you absolutely must have in your quilting arsenal. Luckily, once you buy a rotary cutter, all you’ll really have to do is regularly change out the blade and those are fairly cheap (we’re talking ~$15 for a 2 pack).
Added perk is that these blades can last a very long time. I think I buy new blades every couple of years. Because I was economically disadvantaged (i.e. poor) when I started quilting, I also purchased a rotary blade sharpener (on sale) at the time to help stretch out the life of the blade.
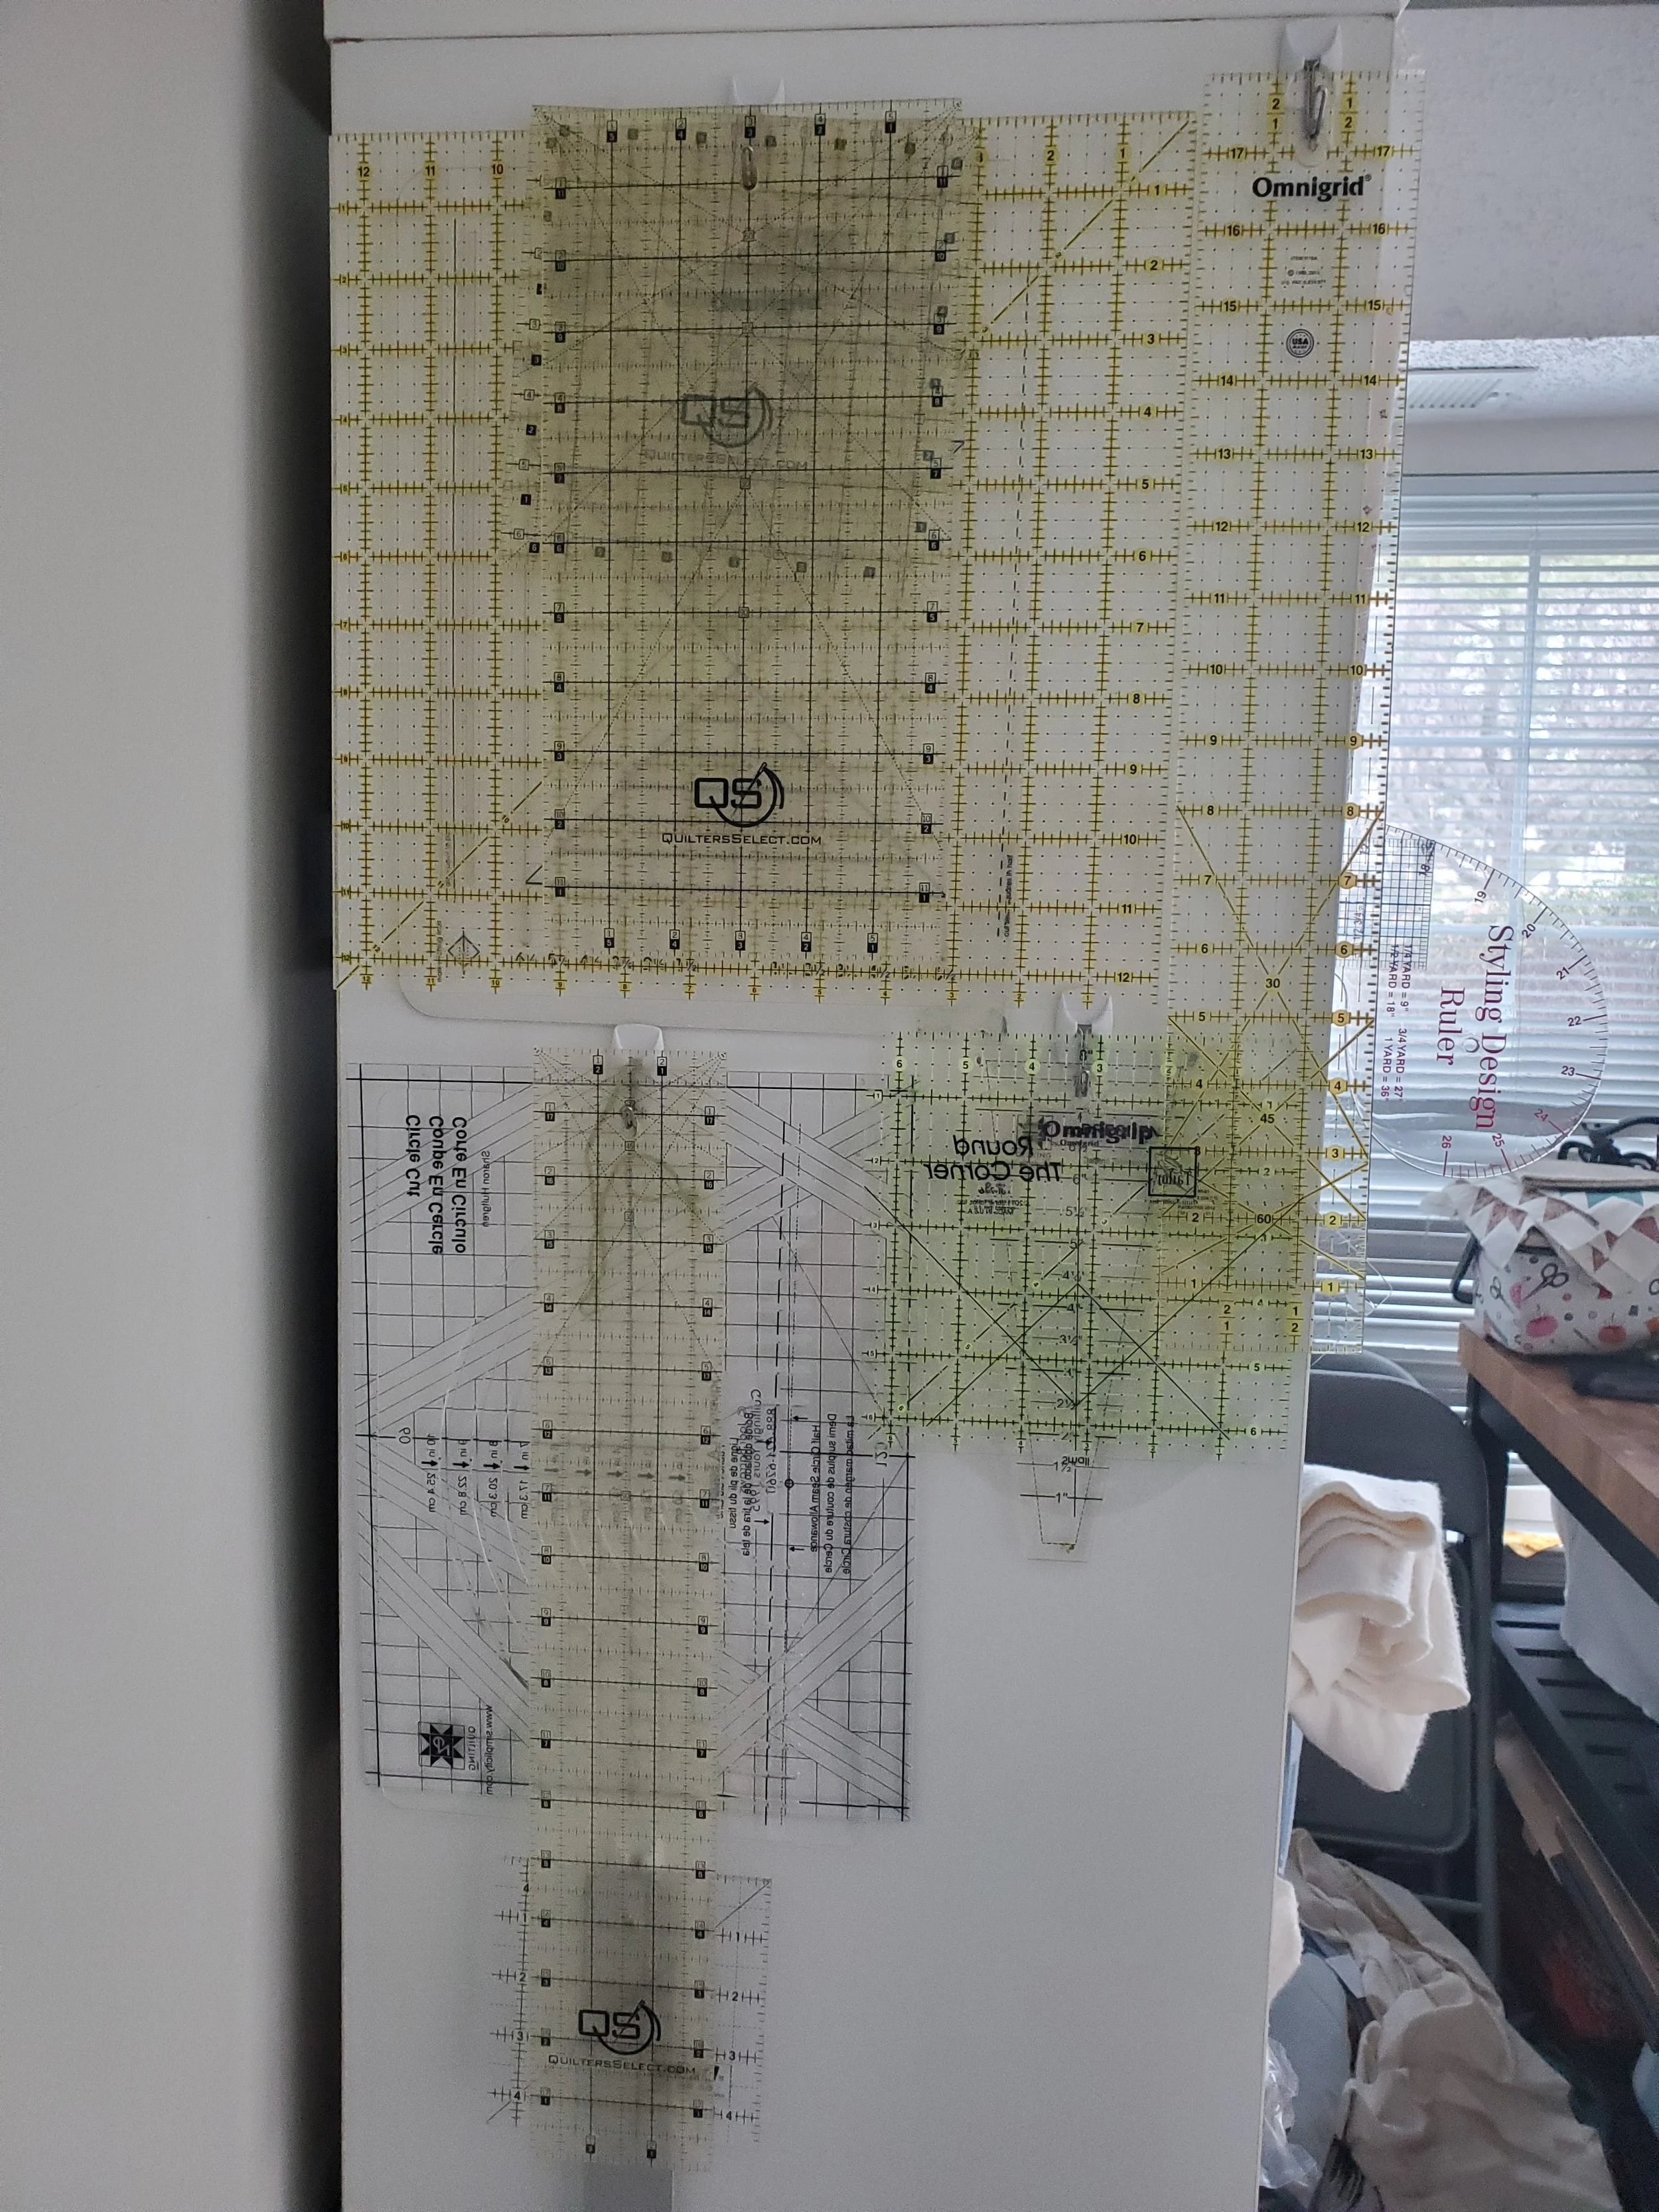
Quilting Ruler ($33+):
A 6” x 24” ruler is ideal for beginners, facilitating cutting both long and small fabric strips.
Starting price: ~ $33.
Can you use any old ruler for quilting? Ummm…No…Highly NOT recommended.
Rulers for quilting are highly specialized and specifically designed with rotary cutters in mind. Quilting rulers are also see through, with easy-to-see markings that make accurate cutting possible. These rulers are usually made of a clear acrylic, are marked in 1/8th inch intervals, and may have a non-slip coating or non-slip pads on one side.
My personal favorite quilting ruler are the Quilter’s Select brand (Warning: these Bad Larry’s are PRICEY), but then again I’ve been quilting for nearly a decade at the time of writing this post, so investing in quality quilting rulers makes sense for me and folks in my position. However, when I first started, I used the Omni-Grip quilting rulers from JoAnn Fabrics and found them to work just fine for me as a beginner (plus, they are a lot more affordable when you are broke and just starting out).
One thing to keep in mind is that quilting is also all about accuracy and math. Rulers specially designed for quilting can help you cut and trim blocks, square up sewn blocks, square up you quilts, and even help you with quilt math. So this is another crucial tool to have in your quilting tool kit.
BONUS NOTE: If you find yourself getting into quilting (I hope you do!), you can often buy rulers in variety packs, which can help you max out on savings.
Rotary Cutting Mat ($25-$80):
Opt for a self-healing mat, ideally sized at 24” x 36” for convenient fabric folding.
Average price (depending on mat size): $25-$80.
A self-healing mat is recommended for any type of sewing project and is fairly self-explanatory. There isn’t much more to it than being used to protect your surfaces when using cutting or marking tools that could potentially create marks, or cause damage to soft surfaces such as wood tables, crafting benches and glass drawing tables.
Self-healing cutting mats are pretty much the standard in the crafting world and are designed to withstand a lot of use and handling. They heal because they are not made of a solid material, like glass or even soft plastic. Instead, self-healing cutting mats are made of tiny particles pressed into a semi-solid surface that absorbs the cuts and then quickly fills in the cut, due to the non-solid nature of material the mat is made from.
Bonus Note: You can buy rotary cutters, mats, and some quilting rulers in a beginner’s kit all at once, which can also save you a bit of money over buying each component individually. Singer has a really comprehensive one that runs around $50 (when not on sale). You can find that here.
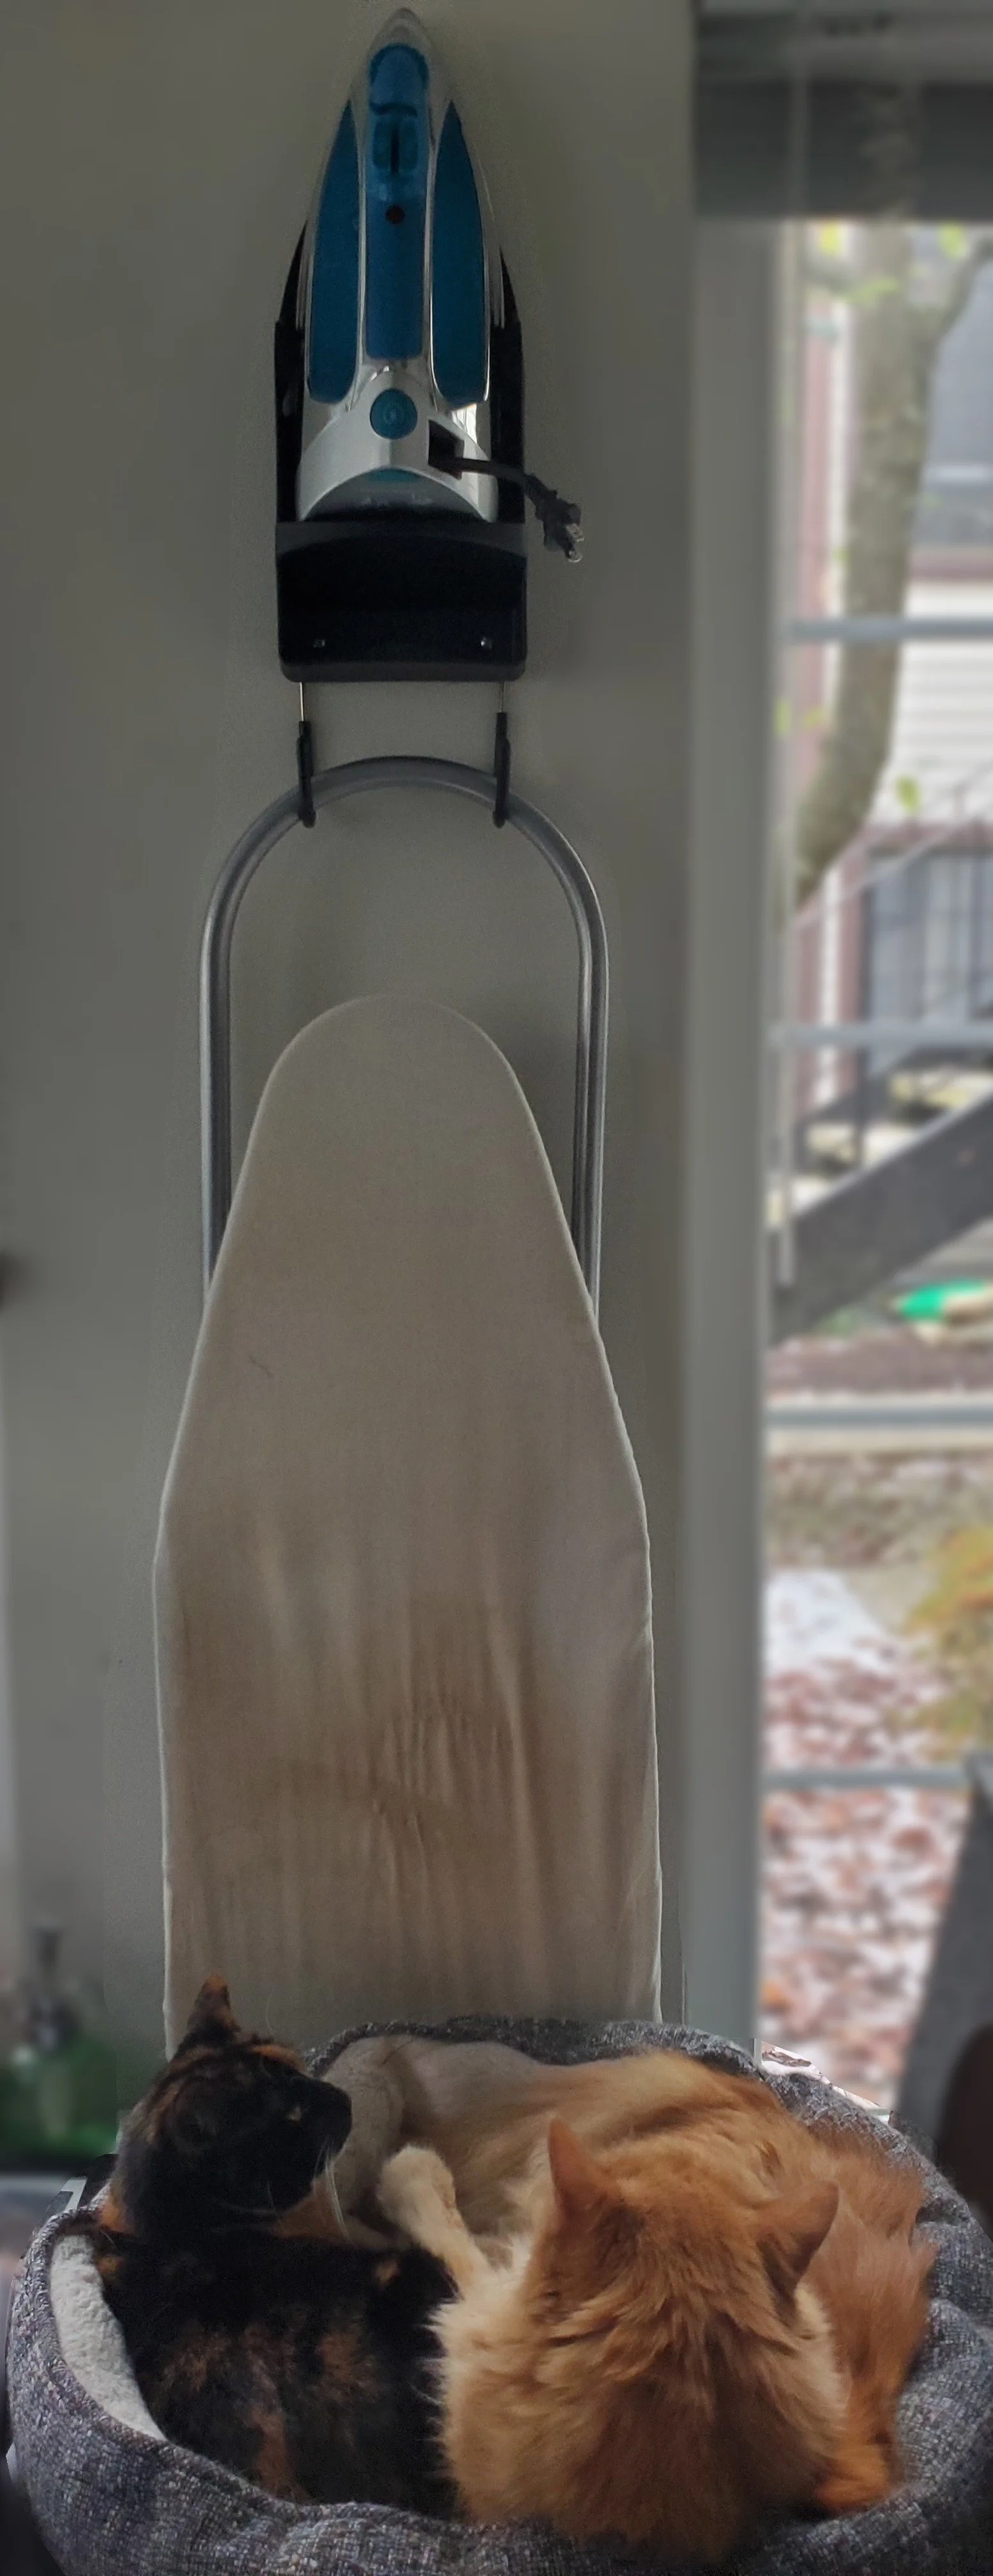
Iron ($25) & Ironing Board ($20):
A basic iron from department stores suffices for quilting needs.
Average price: $25.
A large ironing board is recommended to accommodate various fabric sizes.
Average price: $20.
In quilting, we use our iron to press (not iron). The heat from the iron helps to set seams and ensure sewing accuracy.
Some quilters swear by certain brands or prefer a larger iron to a smaller one. Personally, I am of the opinion that any old iron will do. My favorite one for the longest time was an el-cheapo mini travel iron from Target (now discontinued #sadface). Now I use a cheap Sunbeam large Iron from Target. But when you are just starting out, a cheap iron works just fine.
A large ironing board is better because it can accommodate more variety of fabric sizes, however, if you have limited space (like I do), then a smaller travel ironing board can work just as well. I tend to buy these at Target and do not spend much money on them.
This photo shows how I have my iron and board set up for my small space. Bonus cat tax included.

Seam Ripper ($4-$9):
A crucial tool for correcting mistakes.
Average price: $4-$9.
Every sewer has a love-hate relationship with seam rippers. We love them because they help us fix our mistakes, but we also hate them, because it means we made a mistake. When you are just starting out and you’ve decided to buy a sewing machine, it will most likely come with a seam ripper (its like the manufacturers know us, right?).
I do recommend purchasing at least one more, because those little buggers will grow legs and disappear. So having a few backup seam rippers for those inevitable mistakes we all make (yes, even an experienced quilter like myself still makes mistakes) and one readily available can really make all the difference in your sewing experience.

Safety Pins ($5-$10):
Essential for holding quilt layers together during assembly.
Average price: $5-$10.
While there are a thousand different ways to baste a quilt (basically holding the layers together to you can quilt it into a finished product), I recommend for beginners to use safety pins. You can snag a pack for not too much cost.
You’ll want to use safety pins over tailors pins simply because if you use tailors pins, I can almost guarantee you will get poked by a pin, which is a very unpleasant experience when sewing. There are a few types of safety pins to consider. I know of quilters who love the curved safety pins (these are supposedly easier to pin through the quilt – I haven’t tried them yet, so relying on hearsay here), others who prefer larger safety pins (yours truly included).
Regardless of what safety pin style you choose, remember that they are piercing through multiple layers of fabric and need to be sturdy enough to handle that, so definitely look for safety pins designed specifically for quilting.
Small Scissors or Snips ($9):
Necessary for trimming loose threads.
Average price: $15.
When you start sewing, you’ll inevitably find yourself with lots of small loose threads and fabric frays. Snips are simply a very small pair of scissors that allows you to get in close to those loose threads and trim them. Which would be very difficult and unwieldy with a normal sized pair of scissors.
Just like with rotary cutters, there are a ton of variations and styles on the market. As you continue your quilting journey, you’ll find yourself draw to a particular style. However, just staring out, most sewing machines with come with a pair of snips that you can use. You can also pick up a pair of snips from the fabric stores for around $15 if you want something slightly larger or more ergonomical right off the bat.
Whew…that was a lot so far right? And we haven’t even talked about the fun part yet:
FABRIC!!!!!
I. LOVE. FABRIC. If you are reading this, you probably do too. Fabric is basically the quilter’s drug of choice. We collect and stash like squirrels preparing for winter. But fabric can be on the higher side of quilting expenses (although it doesn’t have to be).
Quilting Cotton Fabric ($45 for 5 yards):
The most enjoyable yet potentially costly part of quilting.
Yardage costs between $5 and $13, averaging $9 per yard.
Depending on where you go to find fabric, your costs may wildly vary. It also depends on how much labor you are willing to put into getting your fabric.
You can find great woven cotton and flannel shirts at Goodwill for very low prices or raid your family and friend’s donation/getting rid of pile, but then you’ll have to spend time cutting them up (This is what I did when I first started quilting because we were poor). A lot of quilts from years past were made this way to extend the life of the fabric they had and there’s a trend in sustainable quilting heading back to this idea. I think this is a great affordable option for quilters who are just beginning because it can help you save money while you learn and develop your style. Plus, it can be a lot of fun to look at the fabric used and know where/who it came from.
As a beginner, you may be nervous about cutting up a bunch of fabric. Totally reasonable. As I mentioned earlier, quilting is all about accuracy and math. If you are just starting out, those can be very intimidating (I still suck at quilt math even with a decade of quilting under my belt). If you fall into this camp, you may want to consider pre-cut packages. Pre-cuts range in size and have the added benefit of having a variety of fabric patterns that already work together. So if you are worried about matching colors, pre-cuts can also take that worry off the table for you.
Batting ($20 for crib size):
The middle layer of the quilt, with pre-packaged batting costing around $10 for a throw size quilt.
You can also use an old flannel blanket if you want to save more on costs here as well. (Do NOT use those fluffy polyester ones)
I could write a whole blog post just about batting (and probably will). It is recommended that you use 100% cotton batting for quilts, as cotton is a natural fiber that breathes better and can help regulate temperature much better than polyester. The Warm Company is my favorite brand and I prefer their natural color batting to white (white usually means it’s been bleached and has contributed to environmental pollution -> again that’s a whole other post).
Here’s my philosophy when it comes to batting:
Buy 100% cotton.
Buy smaller, pre-cut sizes when you are first starting out quilting. These are standardized sizes that can help you practice making your quilts without worrying about math. A crib size will start you around $20, while a king-size will cost you around $50. (Stick with the crib size until you get more comfortable with quilting)
If you find you enjoy it and are making more and more quilted projects, then consider buying batting in bulk (I’m talking Costco-sized bulk). I find this saves me a ton in batting costs as a $200-$500 roll of batting can last me YEARS!
Thread ($4):
Popular choices are polyester and cotton thread, with a small spool costing around $4.
What can I really say about thread?
A surprising amount that could also be another blog post all its own. As you diver deeper into quilting as a hobby, you may find yourself having opinions about thread. But as a beginner just starting out, I recommend you pick a cotton, polyester or cotton/poly blend that works for you and your pocketbook. I know some quilters swear by certain brands of thread, but I’ve found that the Coats & Clark or Gutterman brands work just fine. As long as the tension on your machine is right and your sewing machine is set up to handle the style of spool you’ve purchased, you’ll be fine.
So after all this discussion is quilting an expensive hobby?
I would say that the initial upfront costs can be (purchasing a sewing machine, basic quilting supply tool kit), but once you’ve got the basic supplies, subsequent quilts become significantly more affordable, primarily requiring fabric and batting. And we’ve discussed strategies on how you can be thrifty even with fabric and batting.
Tips for Cost-Effective Quilting
Before we conclude this post, I wanted to leave you with a few tips to think about as you are considering giving quilting a try:
Be Aware of Influences:
Social media can amplify perceptions of quilting as an expensive hobby.
A lot of the quilting influencers you see are in the quilting business. They want you to buy the latest lines and gadgets.
Follow accounts that promote frugal quilting and try to avoid comparisons that breed discontent.
Creative Fabric Sourcing:
Explore thrift stores for cotton sheets, linens, and fabrics.
Raid your family's giveaway bag for potential quilting materials.
Embrace Scrappiness:
Scrap quilting offers a cost-effective and creative alternative to coordinated fabric collections.
Explore your existing fabric stash and embrace the joy of putting together diverse fabrics.
Patterns Aren't Essential:
Consider making quilts without purchasing patterns. Learn a few blocks and you are basically good to go.
Utilize books of basic quilt blocks, explore tutorials, and tap into library resources for pattern inspiration. There are tons and tons of YouTube videos out there on making beginner quilts.
Think Small:
Quilting is not confined to large quilts; explore smaller projects like mini quilts, coasters, and table runners.
Small projects allow for creativity without the high costs associated with larger quilts.
Cost-Effective Batting and Backing:
Use thrifted blankets or flannel sheets as cost-effective batting alternatives.
Purchase batting and backing with coupons, considering larger sizes for future projects.
Hand Quilting or Machine Quilting:
Hand quilting requires minimal equipment and can be a cost-effective and enjoyable quilting method.
If you really want to use a machine, consider purchasing one off a secondhand market place, such as Facebook Marketplace or eBay.
Crafting Joy Within Budget
It saddens me when I hear people associate quilting as an expensive hobby, because it doesn’t have to be. I literally started quilting because we were living below the poverty line, and I needed to stretch everything I had. My quilts are still mostly scrappy, improvisational, and made thrifted fabric to this day.
The heart of quilting lies in its history of frugality and resourcefulness. Quilting, at its core, is a craft born from resourcefulness, creativity, and a love for art. While the initial investment may seem daunting, quilting doesn't have to break the bank; rather, it can be a fulfilling and budget-friendly endeavor for those who approach it with ingenuity and a passion for creation. By making mindful choices and coming up with creative solutions as you are first beginning, you to focus on learning and enjoying the craft. You can always purchase the Gucci supplies later if you really get into quilting.
I hope this answered some questions you may have around picking up quilting as a hobby.
Let me know by leaving a comment below, signing up for my newsletter, or connect with me on Instagram (@kmiddletonartquilting)
Thanks for reading!