


How to make a Pinwheel Block
The Pinwheel Block is made using 4 HSTs. Honestly, I find it easier to make at least 2 HSTs at a time, which is why I chose to make the Pinwheel Block, over making just an HST block.
Half Square Triangles are one of the most versatile blocks you can learn to make. Not only are they commonly found as smaller units within a block (such as Pinwheel), but you can also make an entire quilt out of nothing but half square triangles and place them in several different layouts.
What you will need:
Sewing machine (unless you are planning to hand stitch)
Cutting Mat
Thread
Iron & Ironing Board
Machine Needle
Bobbins
Rotary Cutter
Quilting Ruler
Fabric Marking Pen/Tailor’s Chalk

Step 1:
Cut 2 - 7” x 7” squares from Fabric A (white)
Cut 2 - 7” x 7” squares from Fabric B (paisley).

Step 2:
Draw a diagonal line from corner to corner on the WRONG side of your lightest fabric using a fabric pen/pencil.

Step 3:
Place one square of Fabric A (white) RST to one square of Fabric B and pin.


Step 4:
Sew ¼” on both sides of the line you drew earlier

Step 5:
Cut along the drawn line to create two triangle shapes.
Repeat steps 2-5 with the remaining two squares.


Step 6:
Open one of the triangles you just created. It will open into a square.
Press the seam towards the dark fabric
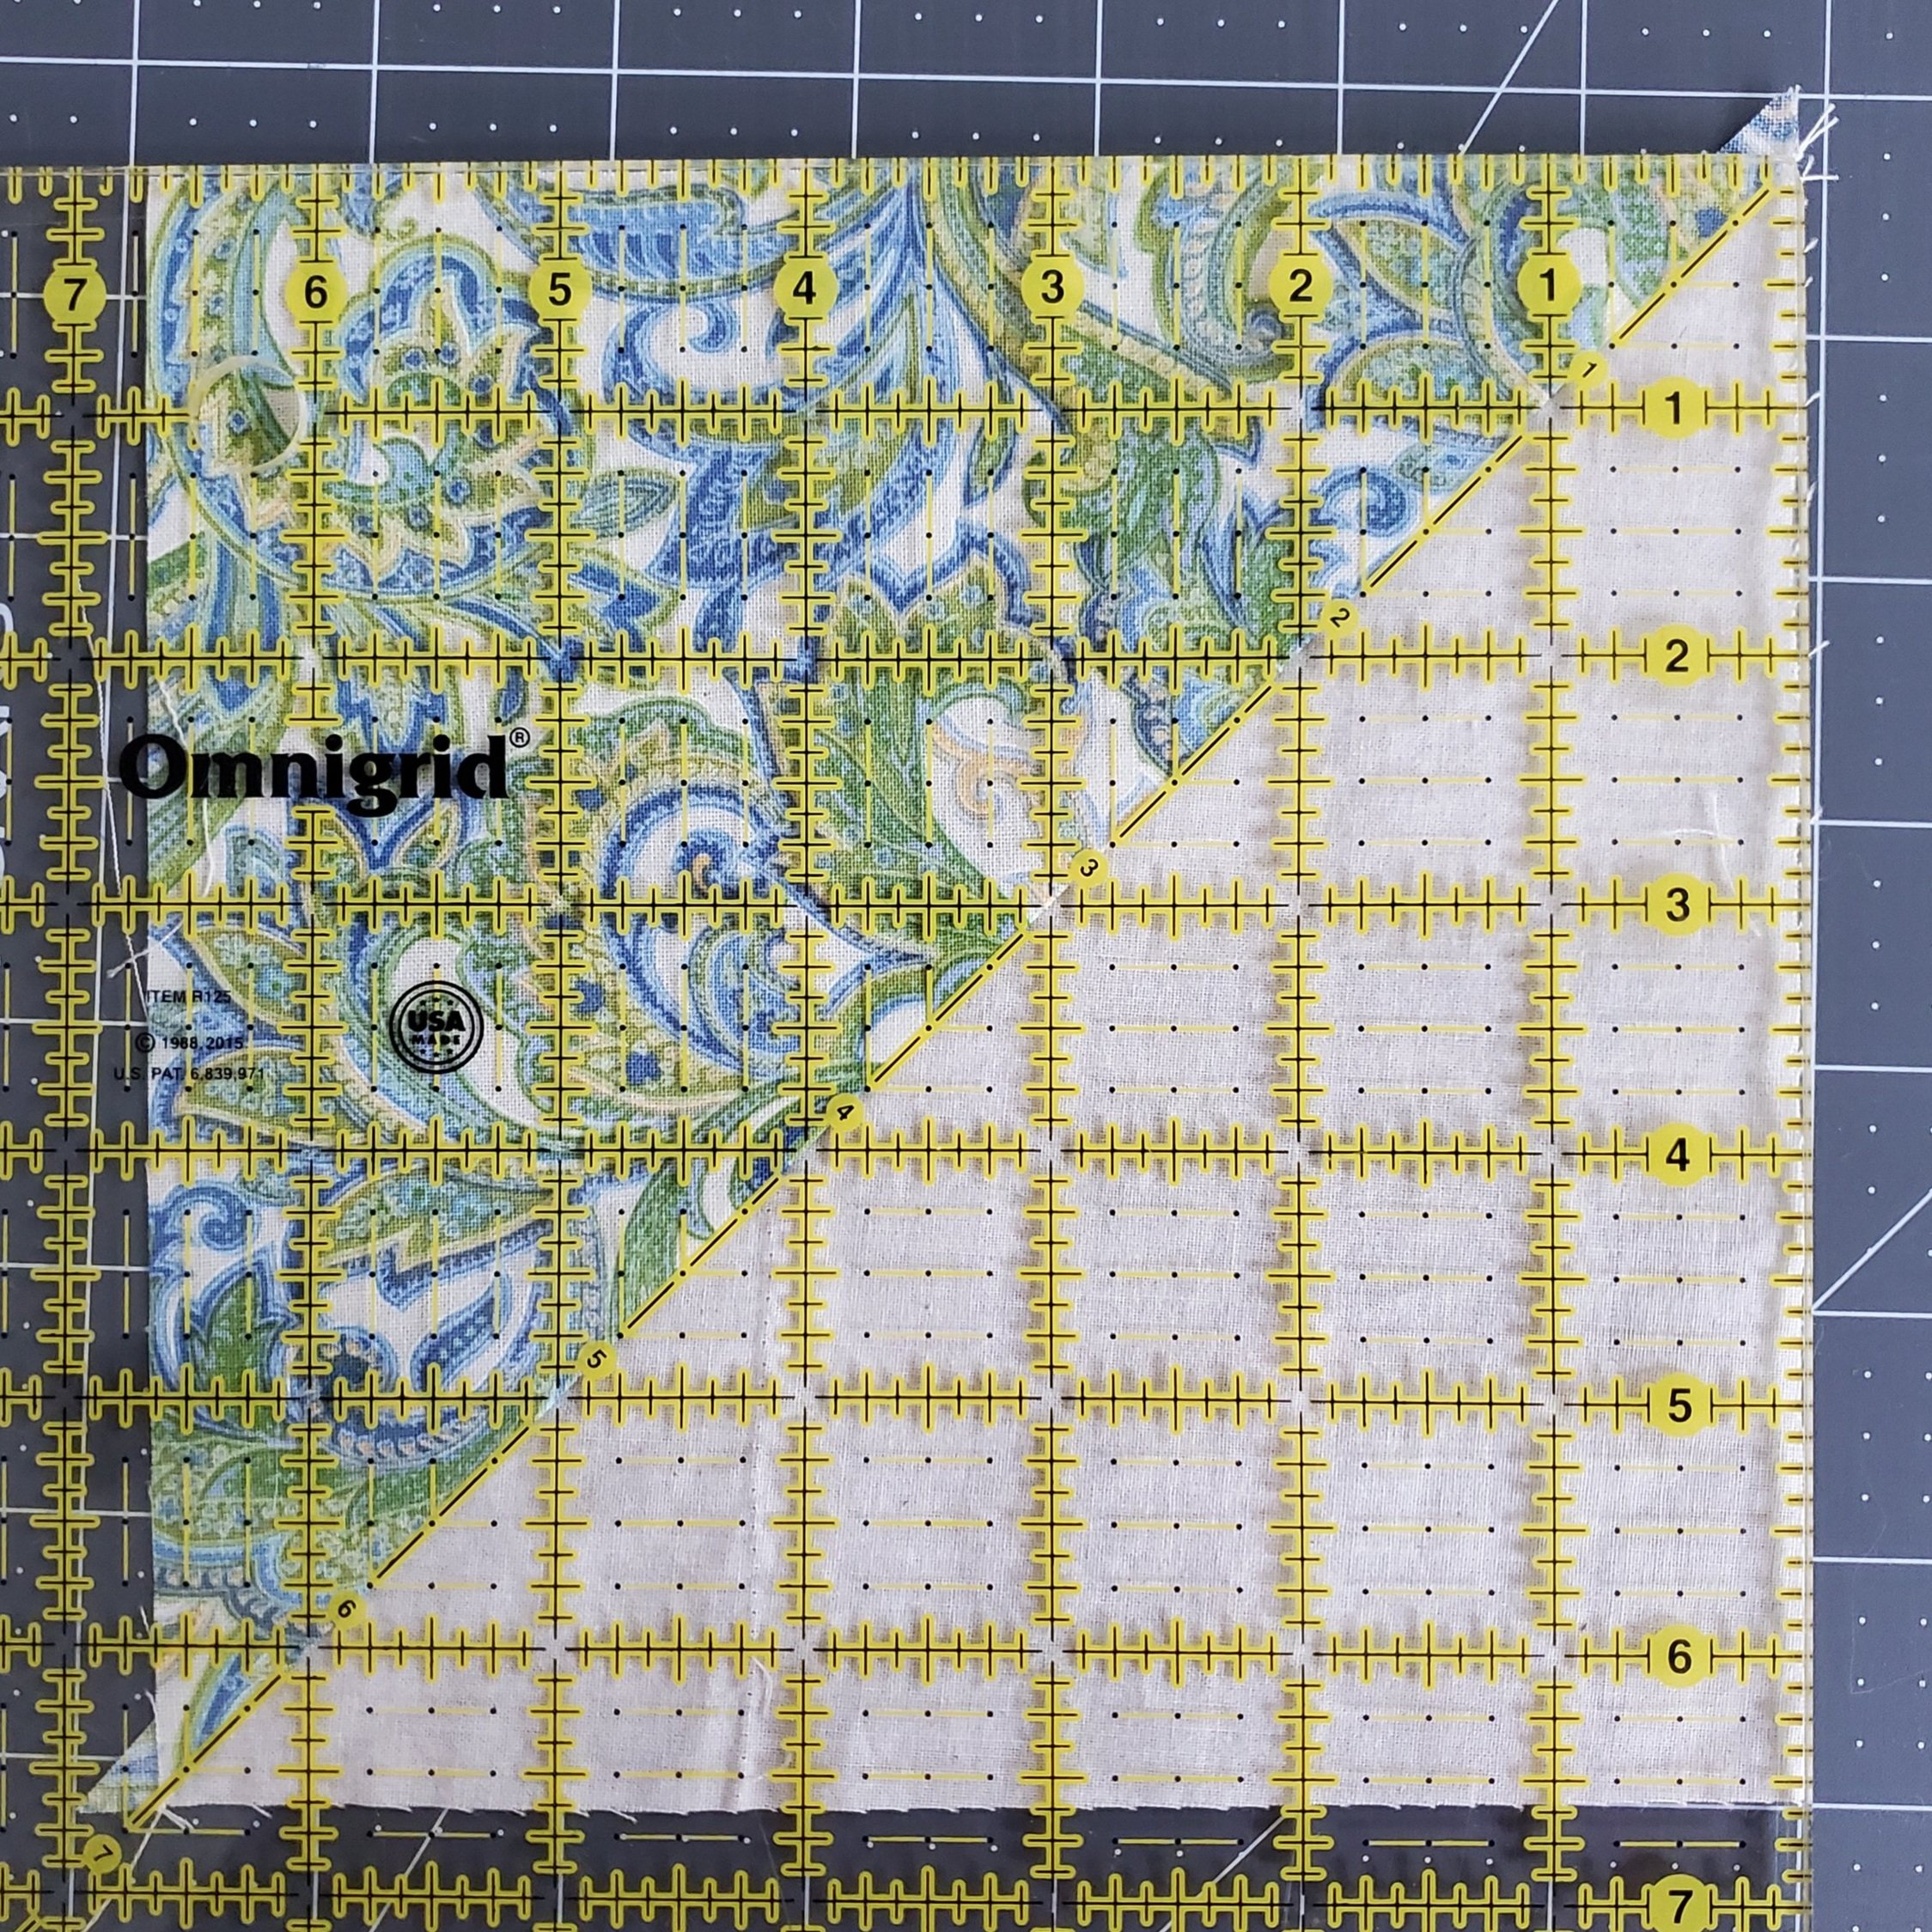
Step 7:
Trim the block to 6.5” x 6.5”
Repeat Steps 6 and 7 for the remaining three Half Square Triangles (HST).

Step 8:
Layout all four HST blocks as shown.
This will be your map to completing your Pinwheel block


Step 9:
Place the two top HSTs RST, making sure to nestle your seams (as shown) and pin in place

Step 10:
Sew the two top HST blocks together as shown using ¼” seam.
Press the seam open. Then repeat steps 9-10 with your bottom blocks


Step 11:
Place the two units together as shown below and pin, making sure to nestle the seams


Step 12:
Sew the two units using ¼” seam.
Press center seam open.

Step 13:
Trim block to 12.5 x 12.5” as necessary.

Voila!
Enjoy your new Pinwheel Block!